When the winter temperature drops, your reliance on a warm, comfortable indoor environment increases instantly. A dependable system does not happen by accident; it requires consistent care, proactive inspections, and timely adjustments. Skipping essential maintenance often leads to higher utility bills, unexpected emergency repairs, and shortened system lifespans.
This comprehensive guide walks you through a practical step-by-step approach to taking control of your indoor comfort. By following these operational procedures and seasonal checks, you can protect your investment, maintain low energy costs, and ensure your home stays cozy throughout the cold months.
The True Cost of Neglecting Your Heating System
Many homeowners treat their HVAC units like set-it-and-forget-it appliances. However, mechanical equipment contains moving parts, electrical connections, and airflow pathways that naturally experience wear and tear over time. Ignoring routine seasonal care allows minor issues to compound into costly problems.
Higher Monthly Utility Bills
Dust accumulation on blower fans, clogged air filters, and misaligned burners force your equipment to work significantly harder to reach the set temperature on your thermostat. When the unit operates inefficiently, it runs for longer cycles, drawing more electricity, natural gas, or oil. Over a single winter season, inefficient performance can increase heating costs by up to fifteen to thirty percent.
Increased Risk of Sudden Mechanical Failure
System breakdowns rarely happen on mild days; they almost always occur during peak usage during extreme cold snaps. The extra stress placed on unmaintained components causes capacitor failure, cracked belts, blower motor burnout, or ignition issues. Regular tune-ups identify these worn parts before they fail completely.
Reduced Equipment Lifespan
A modern residential furnace or heat pump is designed to last anywhere from fifteen to twenty years under ideal conditions. However, constant overheating caused by poor airflow or incorrect burner calibration dramatically accelerates wear. Proper operational care helps maximize the functional life of your unit, delaying expensive replacements.
Indoor Air Quality and Safety Risks
Fuel-burning systems rely on proper combustion and ventilation to vent gases like carbon monoxide safely outside your home. Dirty burners, cracked heat exchangers, or obstructed flues pose severe health and safety risks to your family. Regular maintenance verifies that fuel burns cleanly and exhaust fumes exit properly.
Pre-Season Preparation Checklist
Before the cold weather arrives, conducting preliminary prep work ensures a smooth transition into the heating season.
- Inspect Supply and Return Vents: Walk through every room in your home and make sure furniture, rugs, curtains, or storage boxes are not blocking supply registers or return air grilles. Blocked vents restrict airflow, increasing system static pressure.
- Test Smoke and Carbon Monoxide Detectors: Replace batteries in all safety alarms throughout your house. Ensure carbon monoxide detectors are functioning correctly, particularly if you operate a gas or oil furnace.
- Clear the Space Around Your Unit: Maintain at least three feet of clear space around indoor furnaces, air handlers, and outdoor heat pump units. Remove leaves, debris, stored boxes, and flammable materials from the immediate area.
- Review Thermostat Programming: Verify your heating schedule on your programmable or smart thermostat. Set energy-saving setback temperatures for hours when your family is sleeping or away from home.
Step 1: Master Your Air Filter Replacement Strategy
Air filtration is the single most important factor within a homeowner's direct control. While many people think filters exist solely to clean indoor air, their primary purpose is to protect internal HVAC components from dust and debris accumulation.
Understanding MERV Ratings
Minimum Efficiency Reporting Value (MERV) rates how effectively a filter traps airborne particles.
- MERV 1 to 4: Basic fiberglass filters that capture large dust particles but offer minimal protection for air quality.
- MERV 5 to 8: Pleated filters capable of trapping dust mites, mold spores, and pet dander. These are ideal for standard residential applications.
- MERV 9 to 12: High-efficiency filters that trap smaller particles, including fine dust and auto emissions.
- MERV 13 and Above: Very high efficiency, but they can restrict airflow if your HVAC system blower motor is not designed for high static pressure.
How Often Should You Change Filters?
Filter replacement frequency depends on several environmental factors within your living space:
- Standard Homes without Pets: Inspect monthly and replace every sixty to ninety days.
- Homes with Pets: Replace filters every thirty to sixty days to manage fur and dander buildup.
- Occupants with Allergies or Respiratory Conditions: Replace high-efficiency filters every thirty days during peak heating months.
To change the filter, turn off power to the HVAC unit, locate the filter slot near the return air plenum or blower cabinet, note the airflow direction arrows marked on the filter frame, slide out the dirty filter, and insert the new one in the exact direction of airflow.
Step 2: Calibrate and Upgrade Thermostat Controls
Your thermostat serves as the central control center for your entire comfort system. Inaccurate readings or inefficient scheduling force your equipment to operate longer than necessary.
Mechanical vs. Digital and Smart Thermostats
Older mechanical thermostats use mercury switches or bi-metallic coils that gradually lose calibration over time. Upgrading to a modern programmable or smart thermostat allows precise temperature control, automated scheduling, and remote adjustments via smartphone applications.
Optimal Winter Temperature Settings
Setting your thermostat to a constant high temperature drains energy without heating your home any faster. For an optimal balance between comfort and financial savings:
- Set the daytime temperature to 68°F (20°C) when occupants are active at home.
- Lower the setting by 7°F to 10°F during nighttime hours or when the house is empty for extended periods.
- Avoid rapid manual adjustments; allow programmable settings to ramp temperatures up gradually.
Step 3: Inspect and Clean Ductwork and Vents
Conditioned air must travel freely throughout your home. Leaky, dirty, or obstructed ductwork can reduce overall efficiency by up to thirty percent.
Visual Duct Inspection
Expose accessible duct runs in basements, attics, or crawlspaces. Look for loose connections, sagging flexible ducts, or visible gaps at joints. Use approved foil-backed tape or duct mastic sealant to repair small air leaks. Avoid standard cloth duct tape, which deteriorates rapidly when exposed to heat cycles.
Cleaning Supply Registers and Grilles
Remove metal register covers and wash them with warm, soapy water to remove sticky dust deposits. Vacuum inside duct openings as far as a vacuum hose can reach to clear out accumulated dust, hair, and small debris.
Step 4: Perform Essential Outdoor Heat Pump Care
If your home relies on a heat pump rather than a fuel-burning furnace, the outdoor unit plays a vital role in extracting heat energy from outdoor air and transferring it inside.
Clearing Vegetation and Debris
Leaves, weeds, snow, and ice around the outdoor unit restrict airflow across the condensing coil. Maintain a two-foot clearance around the perimeter and ensure at least four feet of overhead clearance.
Cleaning the Exterior Coils
Turn off power to the unit at the outdoor disconnect box. Use a garden hose with gentle spray pressure to rinse dirt and grime off the exterior aluminum fins. Never use high-pressure power washers, which bend fragile coil fins and damage equipment.
Managing Defrost Cycles and Snow Accumulation
During cold conditions, frost naturally accumulates on outdoor coils. Heat pumps automatically perform periodic defrost cycles to melt this frost. Ensure the outdoor unit is elevated on a concrete or composite pad above typical snowfall levels to prevent ice buildup around the base pan.
Step 5: Combustion and Ignition System Checks
For homes equipped with natural gas, propane, or oil furnaces, safe combustion is critical. While deep burner servicing requires specialized diagnostic tools, homeowners can perform basic safety checks.
Inspecting the Flame Color
Gas furnaces feature burner assemblies visible through an inspection viewport or with the access panel open. Observe the flame during a heating cycle:
- Healthy Flame: A steady, crisp blue flame indicates efficient combustion and proper fuel-to-air mixture.
- Unhealthy Flame: A yellow, lazy, or wavering flame suggests incomplete combustion, dirty burner nozzles, or insufficient intake air. If you notice yellow flames, contact a technician promptly.
Clearing Exhaust Flues and Intake Pipes
High-efficiency furnaces feature PVC vent pipes that terminate outside your foundation wall. Check outdoor termination caps to ensure birds' nests, leaves, drifting snow, or ice do not block the intake or exhaust openings.
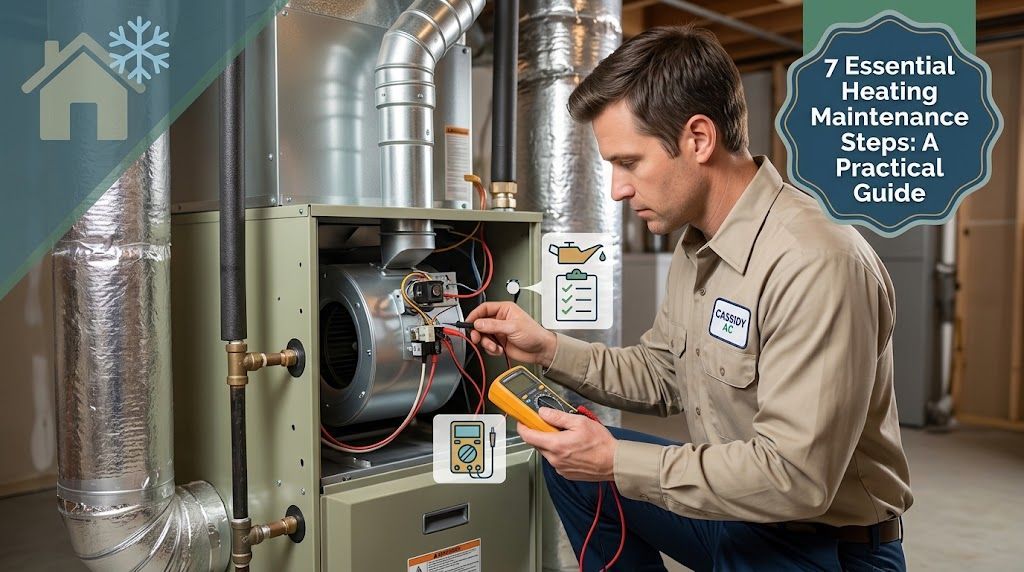
Step 6: Maintain Blower Components and Electrical Wiring
The blower assembly moves heated air through your duct network. Dust accumulation on blower fan blades reduces airflow volume and increases electrical draw on the blower motor.
Blower Assembly Care
- Disconnect power at the main electrical breaker panel.
- Remove the lower furnace access panel.
- Gently wipe visible dust from the blower housing and motor using a soft microfiber cloth or vacuum brush attachment.
- If your motor features accessible oil ports, apply a few drops of non-detergent electric motor oil annually according to the manufacturer's manual (note that many modern motors use sealed bearings that do not require lubrication).
Inspecting Electrical Connections
Vibrations during operation can loosen electrical wiring connections over time. Visually check for frayed wires, burnt insulation, or loose terminal screws. Never touch wiring components without confirming power is turned off at the main electrical disconnect.
Step 7: Schedule Professional Annual Inspections
While DIY tasks keep your equipment running smoothly between seasons, comprehensive operational health requires professional technical expertise. A qualified HVAC professional possesses the specialized tools needed to analyze combustion gases, verify electrical voltage draws, measure system static pressure, and inspect internal heat exchangers for microscopic cracks.
What a Professional Tune-Up Covers
During a professional service visit, a technician will perform advanced diagnostics, including:
- Testing heat exchanger integrity using video scopes and carbon monoxide detectors.
- Measuring blower motor amperage and capacitor microfarad ratings against manufacturer specifications.
- Checking gas pressure manifold settings and adjusting fuel valves for optimal efficiency.
- Lubricating all internal moving parts, bearings, and motor shafts.
- Inspecting safety limit switches, rollout switches, and automatic shutoff controls.
- Flashing flue pipes and verifying draft pressure across venting systems.
Comprehensive seasonal care is the best way to safeguard your home against unexpected utility spikes and sudden system shutdowns. To keep your system running safely and efficiently all year long, schedule a professional
heating maintenance service visit before the cold weather sets in.
Frequently Asked Questions
How often should my heating system be professionally serviced?
You should schedule professional service at least once a year, ideally in late summer or early autumn before turning your unit on for the season. Heat pumps used for both cooling and heating should be serviced twice annually—once before summer and once before winter.
What are the signs that my furnace needs immediate attention?
Key indicators of potential trouble include unusual popping, rattling, or squealing noises, metallic or burning odors, frequent cycling on and off, sudden spikes in energy bills, uneven heating between rooms, or a yellow flame on gas burners instead of a steady blue flame.
Can I run my heating system without an air filter for a short time?
You should never run your system without an air filter installed. Running the blower without a filter allows airborne dust, pet hair, and debris to settle directly onto internal blower wheels and heating elements, causing severe efficiency losses and potential fire hazards within hours.
What is the difference between a system tune-up and an emergency repair?
A tune-up is proactive preventative care performed on a working unit to clean components, adjust settings, and catch minor wear before failure occurs. An emergency repair is reactive work performed when a system breaks down completely or poses an immediate safety risk.